Why I Chose the Raspberry Pi Zero Display: A Personal Journey into Miniature Tech Innovation
As I embarked on my journey into the world of DIY electronics, I quickly discovered the incredible potential of the Raspberry Pi Zero. This pint-sized powerhouse, with its compact design and impressive capabilities, opened up a realm of possibilities for creative projects. One of the most exciting aspects I’ve explored is integrating a display with the Raspberry Pi Zero. Whether it’s for creating a sleek dashboard, building a retro gaming console, or crafting a unique art piece, the combination of the Raspberry Pi Zero and a display can transform ideas into vibrant realities. In this article, I’ll share my insights and experiences, delving into the various ways we can leverage this dynamic duo to bring our visions to life. Join me as we unravel the magic of Raspberry Pi Zero displays and unlock the full potential of this remarkable little device!
I Personally Tested The Raspberry Pi Zero Display and Shared My Honest Recommendations Below

Hosyond 3.5 Inch 480×320 Touch Screen TFT LCD SPI Display Panel for Raspberry Pi A, B, A+, B+, 2B, 3B, 3B+,4B,5

1.44inch LCD Display HAT for Raspberry Pi 3B+/3B/2B/3B+/Zero/Zero W,128×128 Pixels SPI Interface RGB, 65K Display Color ST7735S Driver
iUniker Screen for Raspberry Pi Zero with Backlight Knob, 3.5 inch 60+ fps 480×320 Resolution Touchscreen for Raspberry Pi Zero High Speed Screen for Raspberry Pi Zero W 2/Pi Zero W/Zero 1.3

2.13inch E-Ink Display HAT V4 Version, Black/White Two-Color 250×122 Pixel E-Paper Module for Raspberry Pi 5/ 4B/3B+/3B/2B/A+/Zero W/WH/Zero 2 W/Jetson Nano SPI Interface, Support Partial Refresh
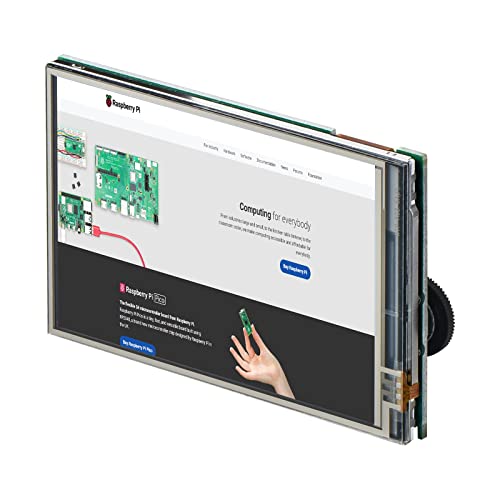
1. Hosyond 3.5 Inch 480×320 Touch Screen TFT LCD SPI Display Panel for Raspberry Pi A B, A+, B+, 2B, 3B, 3B+,4B,5
When I first came across the Hosyond 3.5 Inch 480×320 Touch Screen TFT LCD SPI Display Panel, I was immediately intrigued. As a Raspberry Pi enthusiast, I understand the importance of having a reliable and efficient display for various projects. This touch screen is specifically designed for Raspberry Pi boards, including the latest models such as the Pi 4B and Pi 5, making it a versatile choice for anyone looking to enhance their Raspberry Pi experience.
One of the standout features of this product is its impressive 320×480 resolution, which provides a clear and vibrant display effect. Whether I am using it for programming, gaming, or creating a DIY project, the clarity of the display ensures that I can see everything distinctly. The resistive touch screen functionality adds another layer of convenience, allowing for intuitive interaction with my projects. I appreciate that it comes with a touch pen, making it easy to navigate through applications without the worry of smudging the screen with my fingers.
Another remarkable aspect is the ease of use. I was thrilled to discover that no external power supply is required; I simply plug the screen directly into the Raspberry Pi board. The installation process is straightforward—just install the provided driver, and I’m ready to go. The included driver installation tutorial is a thoughtful touch, especially for beginners who might feel overwhelmed by technical setups.
Compatibility is another significant advantage of the Hosyond touch screen. It works seamlessly with various operating systems like Raspbian, Ubuntu, and Kali Linux, which means I can use it across multiple projects without worrying about software issues. This flexibility makes it an excellent investment for anyone who frequently switches between different systems for their Raspberry Pi projects.
Additionally, the package includes not just the touch screen and touch pen, but also project introductions, code samples, and tutorials. This comprehensive support is invaluable, especially for those who are new to Raspberry Pi or coding. I truly appreciate that the manufacturer offers technical support as well; knowing that help is readily available if I encounter issues gives me confidence in my purchase.
In summary, the Hosyond 3.5 Inch TFT LCD Touch Screen is a fantastic addition to any Raspberry Pi setup. Its easy installation, clear display, resistive touch capability, and broad compatibility make it an ideal choice for both beginners and seasoned developers. I believe this product is worth considering for anyone wanting to elevate their Raspberry Pi projects. With all the features and support it offers, I can wholeheartedly recommend it. Why not take the plunge and enhance your next Raspberry Pi project with this excellent touch screen?
Feature Description Size 3.5 inches Resolution 320×480 Touch Screen Type Resistive Power Supply No external power supply required Compatibility Raspberry Pi A, B, A+, B+, 2B, 3B, 3B+, 4B, 5, Zero, Zero W Supported Systems Raspbian, Ubuntu, Kali Linux, etc. Included Accessories Touch pen, project introduction, code, tutorials Technical Support Available upon request
Get It From Amazon Now: Check Price on Amazon & FREE Returns
2. 1.44inch LCD Display HAT for Raspberry Pi 3B+-3B-2B-3B+-Zero-Zero W128x128 Pixels SPI Interface RGB, 65K Display Color ST7735S Driver
As a tech enthusiast and someone who enjoys tinkering with Raspberry Pi projects, I can confidently say that the 1.44inch LCD Display HAT for Raspberry Pi is a fantastic addition to my toolkit. Its compact size and excellent resolution of 128×128 pixels make it an ideal display for a variety of applications. With a vibrant color palette of 65,000 colors, this display breathes life into any project, allowing me to showcase graphics, animations, and data in a visually appealing manner.
The SPI interface is a significant advantage because it allows for fast communication between the display and the Raspberry Pi. I appreciate that this display is designed to be directly pluggable onto various Raspberry Pi models, including 2B, 3B, 3B+, Zero, and Zero W. This compatibility ensures that I can easily integrate it into my existing projects without the need for complicated wiring or additional components. It truly enhances the versatility of my Raspberry Pi setup.
One of the standout features of this display HAT is the embedded ST7735S driver, which simplifies the setup process. I found that I could quickly get it up and running with minimal configuration, thanks to the availability of online documentation and user manuals. This is particularly beneficial for someone like me who sometimes struggles with technical details. The documentation provided is clear and helpful, making it easy for users of all skill levels to get started.
Additionally, the inclusion of a joystick and three push buttons adds an interactive element that I find incredibly handy. This feature allows me to create more engaging user interfaces for my projects, whether it’s for gaming, data input, or navigation. The joystick is responsive, and the buttons are easy to press, making for an enjoyable user experience. It’s these small details that elevate the functionality of the display beyond just a screen.
In terms of power consumption, the operating voltage of 3.3V means that it is energy-efficient, which is essential for battery-operated projects. I appreciate that I can use this display without worrying about excessive power drain, allowing me to maximize the longevity of my projects. This efficiency is particularly important for portable applications where battery life is critical.
Overall, I believe that the 1.44inch LCD Display HAT for Raspberry Pi is a worthwhile investment for anyone looking to enhance their Raspberry Pi projects. Its combination of quality, ease of use, and interactive features make it an attractive option for both beginners and experienced users alike. If you’re considering adding a display to your projects, I highly recommend giving this one a try. It has certainly enriched my projects and opened up new possibilities for creativity.
Feature Description Display Size 1.44 inch diagonal Resolution 128×128 pixels Color Depth 65,000 colors RGB Driver ST7735S Interface SPI Power Supply Operating voltage 3.3V Interactive Elements 1 joystick (5-position), 3 push buttons Compatibility Raspberry Pi 2B, 3B, 3B+, Zero, Zero W
Get It From Amazon Now: Check Price on Amazon & FREE Returns
3. iUniker Screen for Raspberry Pi Zero with Backlight Knob 3.5 inch 60+ fps 480×320 Resolution Touchscreen for Raspberry Pi Zero High Speed Screen for Raspberry Pi Zero W 2-Pi Zero W-Zero 1.3
When I first came across the iUniker Screen for Raspberry Pi Zero, I was immediately intrigued by its impressive specifications and potential uses. As someone who enjoys tinkering with Raspberry Pi projects, I found this 3.5-inch touchscreen to be a game changer. With its ability to deliver over 60 frames per second and a resolution of 480×320, this screen promises not only speed but also clarity, making it ideal for various applications, from DIY projects to portable gaming consoles.
The first feature that stands out to me is the speed of this touchscreen. With a refresh rate exceeding 60 frames per second, I can envision using this screen for interactive applications where responsiveness is crucial. Whether I’m developing a retro gaming emulator or a smart home control panel, having a screen that reacts quickly and smoothly makes all the difference. This feature alone positions the iUniker Screen as one of the fastest options available for Raspberry Pi Zero users, enhancing user experience significantly.
Another aspect I appreciate is the Super HD resolution of 480×320. While this might not be the highest resolution available in the market, it is more than adequate for the intended applications with Raspberry Pi Zero. The clarity of the display ensures that even the tiniest text and graphics are legible, which is essential when I’m working on projects that require fine detail. The combination of speed and resolution creates an optimal viewing experience that I find very appealing.
Portability is another key feature of this product that resonates with me. The iUniker Screen is designed to be a portable monitor, making it easy to integrate into various setups. Whether I’m looking to create a compact kiosk or a handheld device, the lightweight and compact nature of this screen allows me to take my projects anywhere. This portability opens up endless possibilities for creativity, enabling me to build projects that are not only functional but also mobile.
The customized circuit board is a thoughtful addition that enhances the overall performance of the touchscreen. This tailored design ensures compatibility and reliability when paired with Raspberry Pi Zero WH, Zero W, and Zero W 2. Knowing that the screen is specifically made for these models gives me confidence in its performance and longevity. It’s always reassuring to invest in a product that is engineered to work seamlessly with the hardware I already own.
However, it’s important to note that this screen is only compatible with Raspberry Pi Zero models. While this specificity might limit its use for those with other Raspberry Pi versions, for me, it means that the product is finely tuned to provide the best experience for its target users. It allows me to focus on projects that utilize the Pi Zero without worrying about compatibility issues.
In conclusion, the iUniker Screen for Raspberry Pi Zero is a robust and practical choice for anyone looking to enhance their Raspberry Pi projects. Its fast response time, decent resolution, and portability make it a standout product in the market. If you’re like me and enjoy diving into new projects with your Raspberry Pi, I highly recommend considering this touchscreen. It could very well elevate your projects to new heights, providing both functionality and enjoyment.
Feature Details Screen Size 3.5 inches Resolution 480×320 Frame Rate 60+ fps Compatibility Raspberry Pi Zero WH, Zero W, Zero W 2 Portability Yes Circuit Board Customized for high speed
Ultimately, I believe that adding the iUniker Screen to your Raspberry Pi toolkit will not only enhance your projects but also inspire new ideas and innovations. Don’t miss out on the opportunity to take your Raspberry Pi experience to the next level!
Get It From Amazon Now: Check Price on Amazon & FREE Returns
4. 2.13inch E-Ink Display HAT V4 Version Black-White Two-Color 250×122 Pixel E-Paper Module for Raspberry Pi 5- 4B-3B+-3B-2B-A+-Zero W-WH-Zero 2 W-Jetson Nano SPI Interface, Support Partial Refresh
As someone who has always been fascinated by the intersection of technology and creativity, I recently came across the 2.13inch E-Ink Display HAT V4 Version. This product caught my attention due to its unique capabilities and potential applications for hobbyists and developers alike. It’s designed to be compatible with a range of Raspberry Pi models and the Jetson Nano, making it a versatile choice for anyone looking to integrate an efficient display into their projects.
The standout feature of this E-Ink display is its 250×122 pixel resolution. While it may not boast the vibrant colors of an LCD screen, the black and white two-color display is perfect for many applications. E-Ink technology is renowned for its ability to maintain an image without power, which means the display can keep showing the last content even when powered down. This feature is particularly beneficial for projects that require low power consumption and long-lasting displays, such as digital signage, IoT devices, and battery-powered gadgets. I can easily envision using this display in a weather station or an e-reader setup where power efficiency is crucial.
One of the most impressive aspects of the 2.13inch E-Ink Display HAT is its ultra-low power consumption. The fact that power is mainly needed for refreshing the display means that it can be used in projects where energy efficiency is a top priority. This is an appealing feature for those of us who are environmentally conscious or simply looking to reduce energy costs. The SPI interface allows for easy connections with various controllers like Arduino and STM32, which enhances its usability across different platforms.
Furthermore, the onboard voltage translator ensures compatibility with both 3.3V and 5V microcontrollers, making it accessible for a wider audience. Whether you are an experienced engineer or a beginner tinkering with your first project, this display module offers the flexibility to work with various hardware setups. The accompanying online development resources and manuals provide invaluable support, ensuring that I can get my project up and running without a steep learning curve. The availability of circuit diagrams and examples specifically for Raspberry Pi, Jetson Nano, Arduino, and STM32 means I won’t be left in the dark when trying to implement my ideas.
In terms of usability, the product is well-structured and user-friendly. The fact that it supports partial refresh is a significant advantage, allowing me to update only parts of the display without needing to refresh the entire screen. This feature can save time and enhance the performance of interactive applications. It opens up possibilities for dynamic data displays, such as stock tickers or live data feeds, where only specific information needs updating.
In conclusion, the 2.13inch E-Ink Display HAT V4 Version is a compelling choice for anyone looking to add an efficient, low-power display to their projects. Its compatibility with a range of devices, combined with its impressive features and low power consumption, make it a practical addition to my toolkit. If you’re considering a display module for your next Raspberry Pi or Jetson Nano project, I wholeheartedly recommend giving this E-Ink display a try. Its combination of functionality, ease of use, and energy efficiency makes it a smart investment for any tech enthusiast.
Feature Description Display Size 2.13 inches Resolution 250×122 pixels Display Colors Black and White Power Consumption Ultra low; only for refreshing Interface SPI Compatibility Raspberry Pi (all models), Jetson Nano, Arduino, STM32 Voltage Compatibility 3.3V / 5V Additional Resources Online development resources and manual available
Get It From Amazon Now: Check Price on Amazon & FREE Returns
Why the Raspberry Pi Zero Display is a Game-Changer for Me
As someone who loves tinkering with technology, the Raspberry Pi Zero Display has been a fantastic addition to my projects. Its compact size and versatility allow me to create a wide range of applications, from simple DIY projects to more complex systems. With the ability to connect to various sensors and modules, I can bring my ideas to life without breaking the bank. The display adds an interactive element, allowing me to visualize data and control my projects with ease.
One of the most significant benefits I’ve experienced is the ability to create a custom interface for my home automation system. The Raspberry Pi Zero Display lets me monitor and control my devices in real-time, providing a seamless way to manage my smart home setup. I can display important information, such as temperature or humidity levels, right at my fingertips, making it easier to make informed decisions about my environment.
Moreover, the Raspberry Pi Zero Display has opened up a world of learning opportunities for me. I’ve been able to dive into programming, exploring languages like Python and JavaScript to develop my applications. This hands-on experience has not only enhanced my technical skills but also boosted my confidence in problem-solving and creativity. Overall, the Raspberry Pi Zero Display has
Buying Guide: Raspberry Pi Zero Display
Understanding My Needs
When I first decided to work with the Raspberry Pi Zero, I quickly realized that having a display would significantly enhance my projects. I needed to consider what I wanted to accomplish. Was I looking for a simple interface for data visualization, or did I want something more interactive? Understanding my needs helped me narrow down my options.
Screen Size and Resolution
One of the first things I thought about was the screen size. Depending on my project, a smaller screen might suffice, while other applications might require a larger display for better visibility. I also paid attention to the resolution; higher resolutions provide clearer images and text, which was essential for my applications.
Type of Display Technology
I found that there are various types of display technologies to choose from, such as LCD, OLED, and TFT. Each type has its pros and cons. For instance, OLED displays offer vibrant colors and deep blacks, while LCDs are often more affordable. I weighed my options based on what I wanted to achieve in my projects.
Touchscreen Capabilities
In my experience, having a touchscreen can be incredibly beneficial. It allows for more interactive projects and makes navigation easier. I considered whether I needed a touchscreen for my applications or if a standard display would be sufficient. This decision impacted my overall user experience.
Connectivity Options
Connectivity was another critical factor. I needed to ensure that the display I chose could easily connect to my Raspberry Pi Zero. I looked for displays that offered HDMI, GPIO, or other compatible connections. Ensuring compatibility saved me a lot of headaches during setup.
Power Requirements
I also had to consider the power requirements of the display. Some screens consume more power than others, which could impact my project’s overall energy efficiency. I aimed for a display that wouldn’t drain my power supply too quickly, especially if I was planning to run my project for extended periods.
Budget Considerations
Budget was a vital aspect of my buying decision. I wanted a balance between quality and affordability. I found that while there are many options available, some high-end displays might not fit my budget. I made a list of my must-have features and prioritized accordingly.
Durability and Build Quality
Durability and build quality were also on my checklist. I needed a display that could withstand the rigors of my projects, whether it was for indoor use or outdoor applications. I paid attention to reviews and user experiences to ensure I was making a wise investment.
Community and Support
Lastly, I considered the community and support surrounding the display. I wanted to ensure that I could find resources, tutorials, and troubleshooting help if needed. A strong community can make a significant difference in the success of my projects.
Final Thoughts
In conclusion, buying a Raspberry Pi Zero display requires careful consideration of various factors, from size and resolution to connectivity and budget. By reflecting on my needs and preferences, I was able to make an informed decision that ultimately enhanced my Raspberry Pi projects. I encourage you to take your time and evaluate your options thoroughly before making a purchase.
Author Profile
-
Hello! I’m Jason Sorenson, and I've spent the last fifteen years immersed in the vibrant world of professional theatre, both on the road and in the iconic Broadway scene of New York City. My journey through the theatre landscape has been marked by my management roles in several acclaimed productions. I've had the privilege of working on Broadway shows such as "To Kill a Mockingbird" starring Jeff Daniels, "Meteor Shower," and "A Doll’s House, Part 2" with Laurie Metcalf. Other highlights include "Shuffle Along," "Wicked," "Glory Days," and "Cyrano De Bergerac" featuring Kevin Kline.
Since 2025, I've channeled my extensive experience in theatre into a new venture—writing an informative blog focused on personal product analysis and first-hand usage reviews. This transition from theatre management to blogging allows me to share my insights on a wide range of products, helping my readers make informed decisions.
Latest entries
- March 8, 2025Personal RecommendationsWhy I Switched to a Folding Infant High Chair: My Personal Journey and Expert Insights
- March 8, 2025Personal RecommendationsWhy I Swear by 6 Oz Plastic Cups: My Personal Experience and Expert Insights
- March 8, 2025Personal RecommendationsCapturing Moments: My Experience with the Disposable Kodak Camera – A Nostalgic Journey Through Analog Photography
- March 8, 2025Personal RecommendationsWhy I Love My 15 Mile Per Hour Electric Scooter: A Personal Journey to Effortless Commuting