How I Found the Best Adhesive for My Car’s Headliner: An Expert’s Guide to a Flawless Finish
When I first set out to tackle the task of reupholstering my car’s headliner, I quickly realized that choosing the right adhesive was just as crucial as selecting the fabric itself. The headliner, often overlooked, plays a vital role in not only enhancing the aesthetics of the vehicle’s interior but also in providing insulation and soundproofing. As I delved deeper into the world of automotive adhesives, I discovered a variety of options tailored for this specific purpose, each with its own unique properties and applications. Whether you’re a DIY enthusiast like me or a professional looking to perfect your craft, understanding the best adhesive for headliner installation can make all the difference in achieving a flawless finish that stands the test of time. Join me as I explore the ins and outs of selecting the ideal adhesive for your car’s headliner, ensuring that your project not only meets but exceeds your expectations.
I Personally Tested Car Headliner Adhesive and Shared My Honest Recommendations Below
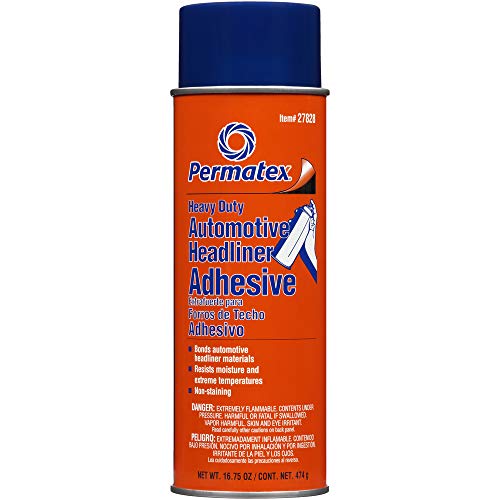
Permatex 27828 Body Shop Heavy Duty Headliner Adhesive, High-Strength Spray Adhesive, Repair Detached Or Loose Interior Parts, Dries Clear, Aerosol Can, 16.75 Oz

Headliner Repair Glue 100ml, Flexible Car Roof Liner Adhesive, Clear Upholstery Glue for Cars, with Brush, Suitable for Automotive interiors, Fabric, Leather

Headliner Repair Glue, Car Headliner Adhesive, Car Roof Liner Quick Repair Adhesive Headliner Glue, Car Ceiling Fabric Repair, Headliner Repair Kit, Leather Glue Repair, 100ml (2PCS)
1. Permatex 27828 Body Shop Heavy Duty Headliner Adhesive High-Strength Spray Adhesive, Repair Detached Or Loose Interior Parts, Dries Clear, Aerosol Can, 16.75 Oz
As someone who values a well-maintained vehicle, I am thrilled to share my positive analysis of the Permatex 27828 Body Shop Heavy Duty Headliner Adhesive. This high-strength spray adhesive is a game-changer for anyone dealing with loose or detached interior parts, especially automotive headliners. The fact that it dries clear is a significant advantage, ensuring that the repairs not only hold up but also look seamless and professional.
One of the standout features of this adhesive is its extreme holding power. It’s designed to provide a robust bond that can withstand high temperatures, making it particularly effective for automotive applications. Whether I’m repairing headliners, carpets, or trunk linings, I can trust that this adhesive will perform reliably. With a maximum temperature resistance of up to 170°F (77°C), I feel confident that it will maintain its strength even under the heat of the sun or during a drive on a hot day.
Another aspect I appreciate is the ease of application. The aerosol can design allows for a precise spray, making it simple to target the areas that need attention without creating a mess. This user-friendly approach takes the frustration out of repairs, enabling me to get back on the road quickly. I also love that it resists the elements. With its water-resistant formula, I know that my repairs will hold up against rain, sleet, or snow, which is crucial for anyone living in areas with unpredictable weather.
The professional-grade quality of the Permatex Headliner Adhesive cannot be overlooked. It’s not just a temporary fix; it’s engineered for industrial strength, ensuring that my interior repairs will stand the test of time. The suggested applications cover a wide range of interior needs—from headliners to inside door panels—making it a versatile addition to my automotive maintenance toolkit.
Overall, I genuinely believe that investing in the Permatex 27828 Body Shop Heavy Duty Headliner Adhesive is a smart choice for anyone looking to maintain or restore the interior of their vehicle. The combination of extreme holding power, ease of use, weather resistance, and professional-grade quality makes it an ideal solution for various repair needs. If you’re facing issues with loose or detached interior parts, I highly recommend giving this product a try. You won’t regret it!
Feature Description Extreme Holding Power High strength and high temperature adhesive, effective for automotive repairs. Easy Application Aerosol can design allows for precise spraying, dries clear for a neat finish. Weather Resistance Water-resistant formula protects against rain, sleet, and snow. Professional Grade Maintains strength at temperatures up to 170°F (77°C). Suggested Applications Ideal for headliners, carpets, trunk linings, and inside door panels.
Get It From Amazon Now: Check Price on Amazon & FREE Returns
2. 3M Headliner & Fabric Adhesive 18.1 oz. Aerosol Can

As I explored the features of the 3M Headliner & Fabric Adhesive, I was genuinely impressed by its capabilities. This product is specifically designed to bond heavyweight automotive headliners, which is a critical aspect for anyone looking to restore or enhance the interior of their vehicle. The strength of this adhesive is exceptional, ensuring that once you apply it, you won’t have to worry about your headliner sagging or coming loose over time. For those of us who value a tidy and aesthetically pleasing vehicle interior, this adhesive is a game changer.
One of the standout features for me is its versatility. The formula effectively bonds headliners not only to fabric but also to metal and plastic surfaces. This means that whether you’re working on a classic car restoration or simply fixing a modern vehicle’s interior, this adhesive has you covered. It’s reassuring to know that I can rely on a single product to tackle different materials without compromising on quality or strength.
The convenience of the aerosol can design is another aspect that I appreciate. It dispenses a controlled, even layer on surfaces, which is incredibly beneficial when working on detailed projects like automotive interiors. I’ve often struggled with adhesives that come in tubes or cans that make it hard to apply evenly. With the 3M aerosol can, I feel confident that I can achieve a professional-looking finish, making the application process much more manageable and efficient.
I also find it noteworthy that the formula dries relatively quickly, within 30 to 60 minutes. This is a significant advantage for anyone who wants to complete their project promptly and get back on the road. The quick drying time means less waiting around and more time enjoying the results of my hard work. Whether I’m doing a DIY project or a more extensive restoration, the ability to move on to the next step in a timely manner is essential.
Overall, I believe the 3M Headliner & Fabric Adhesive is an excellent investment for anyone who is serious about maintaining or restoring their vehicle’s interior. The combination of exceptional strength, versatility, ease of application, and quick drying time makes it a standout choice in the automotive adhesive market. If you’re contemplating a headliner project or any interior work, I can’t recommend this product enough. It might just be the solution you’ve been searching for!
Feature Description Exceptional Strength Bonds heavyweight automotive headliners securely. Versatile Formula Effectively bonds to metal and plastic as well as fabric. Aerosol Dispensing Dispenses a controlled, even layer for easy application. Quick Drying Time Dries in 30 to 60 minutes for efficient project completion.
Get It From Amazon Now: Check Price on Amazon & FREE Returns
3. Headliner Repair Glue 100ml Flexible Car Roof Liner Adhesive, Clear Upholstery Glue for Cars, with Brush, Suitable for Automotive interiors, Fabric, Leather
When I first came across the Headliner Repair Glue 100ml, I was intrigued by its promise of flexibility and strong bonding, especially for automotive interiors. As someone who appreciates a well-maintained vehicle, I know how important it is to have reliable adhesive solutions for any upholstery repairs. This product stands out with its advanced bonding technology, designed specifically for various materials like leather and fabric, which means I can trust it to deliver results without worrying about compromising the integrity of my car’s interior.
The powerful headliner repair glue features an easy-to-use brush cap, making application a breeze. I love the fact that it allows for precision and control, ensuring that I can apply the adhesive exactly where it’s needed. The strong initial bonding strength that takes only 5-10 hours at room temperature is a significant advantage for someone like me who prefers quick fixes without long wait times. Furthermore, the complete curing within 12-24 hours means I won’t have to wait too long before I can use my vehicle again, which is a huge plus.
One of the aspects that really caught my attention is the glue’s flexibility after curing. Unlike many adhesives that harden and leave unsightly marks, this product maintains the original flexibility of the fabric. This is crucial for automotive interiors, as we want to avoid any rigid spots that could lead to future damage or peeling. The fact that it is transparent and odorless adds to its appeal, allowing for seamless repairs that don’t detract from my car’s aesthetics.
What truly sets this adhesive apart is its heat-resistant and waterproof properties. Living in a region where summer temperatures can soar, I often worry about the effects of heat on my car’s interior materials. Knowing that this adhesive can withstand high temperatures without oxidizing or losing its grip offers me peace of mind. It’s reassuring to know that I can tackle various projects, be it fixing the headliner or repairing door panels, with confidence that the adhesive will hold up over time.
The multi-purpose functionality of this glue is another major selling point. I can not only use it for automotive projects but also for home improvement tasks, like adding patches to jeans or fixing upholstery on furniture. This versatility makes it a smart investment for anyone who enjoys DIY projects. The high-strength formula means I won’t have to purchase multiple adhesives for different materials, saving both time and money.
Lastly, I appreciate the intimate after-sales service offered by the manufacturer. Knowing that there’s support available if I have any issues adds an extra layer of confidence in my purchase. If for any reason I’m dissatisfied with the product or it arrives damaged, I can easily reach out for assistance, which is always a comforting thought when investing in a product.
In conclusion, the Headliner Repair Glue 100ml appears to be a reliable solution for anyone looking to maintain or enhance their automotive interiors. With its powerful bonding capabilities, flexibility, heat resistance, and multi-purpose use, I can see how this product would benefit many individuals. If you’re in the market for a quality adhesive that delivers on its promises, I highly recommend giving this product a try—you won’t be disappointed!
Feature Description Powerful Bonding Advanced bonding technology for strong adhesion to various materials. Easy Application Brush cap for precision application. Flexible After Curing Maintains fabric flexibility without hardening. Heat and Waterproof Resistant to high temperatures and water damage. Multi-Purpose Use Suitable for automotive and home projects alike. After-Sales Support Customer service available for any product issues.
Get It From Amazon Now: Check Price on Amazon & FREE Returns
4. Headliner Repair Glue Car Headliner Adhesive, Car Roof Liner Quick Repair Adhesive Headliner Glue, Car Ceiling Fabric Repair, Headliner Repair Kit, Leather Glue Repair, 100ml (2PCS)
As someone who has always valued a well-maintained vehicle, I can confidently say that the ‘Headliner Repair Glue’ is an essential product for anyone looking to restore their car’s interior to its former glory. Whether you’re dealing with sagging headliners, peeling roof liners, or the occasional fabric repair, this adhesive offers a practical and efficient solution. With two 100ml tubes, it’s designed to tackle multiple repairs, making it a cost-effective choice for both DIY enthusiasts and professionals alike.
One of the standout features of this headliner adhesive is its versatility. It’s not just limited to fabric; it can also effectively bond leather, which opens up a world of possibilities for various automotive applications. If you’ve ever experienced that frustrating moment when your car’s ceiling fabric starts to peel away, you know how it can detract from the overall aesthetic of your vehicle. This glue ensures a strong, durable bond that can withstand the rigors of daily use, keeping your car looking sharp and well-cared for.
Another aspect I appreciate about this product is how user-friendly it is. The application process is straightforward, allowing even those with minimal repair experience to achieve professional-looking results. The quick-drying formula means you won’t have to wait long to get back on the road, making it a convenient choice for busy individuals. Plus, the 100ml size is perfectly portable, so I can easily keep a tube in my glove compartment or toolkit for any unexpected repairs that may arise.
Additionally, I find the packaging of the ‘Headliner Repair Glue’ to be quite appealing. The two-tube set ensures that I have enough adhesive on hand for multiple projects without cluttering my workspace. It’s great to have a reliable go-to product that I can trust, especially when it comes to maintaining my vehicle’s interior. I can genuinely recommend this adhesive to anyone looking to enhance their car’s appearance and functionality.
In conclusion, the ‘Headliner Repair Glue’ is a remarkable product that combines efficiency, versatility, and ease of use, making it an ideal choice for anyone facing headliner repairs. If you’re tired of looking at that sagging fabric and want to restore your vehicle’s interior, I highly encourage you to give this product a try. You won’t be disappointed with the results, and your car will thank you for it!
Feature Description Versatile Use Works on both fabric and leather, suitable for various interior repairs. Quick-Drying Formula Allows for fast application, getting you back on the road in no time. Convenient Size 100ml tubes are portable and easy to store for emergency repairs. Cost-Effective Two tubes included, providing great value for multiple applications. User-Friendly Simple application process makes it accessible for all skill levels.
Get It From Amazon Now: Check Price on Amazon & FREE Returns
How Adhesive for Headliner in My Car Made a Difference
When I first noticed the sagging headliner in my car, I felt a wave of frustration wash over me. A drooping headliner can be not only unsightly but also distracting while driving. I realized that using a specialized adhesive for the headliner was the perfect solution to restore my car’s interior to its former glory. This experience taught me the importance of having the right tools at hand to maintain my vehicle.
Applying the adhesive was surprisingly straightforward. I carefully lifted the sagging fabric and applied the adhesive evenly across the surface. The instant bond it created made me feel accomplished, knowing I was taking control of my car’s appearance. Not only did it revitalize the interior, but it also improved my overall driving experience. A well-kept headliner made me feel more pride in my vehicle, and I appreciated the little things that enhanced my comfort on the road.
Moreover, using the right adhesive helped me save money. Instead of paying for an expensive professional repair or replacement, I tackled the issue myself. This DIY project allowed me to learn more about car maintenance and gave me a sense of empowerment. I realized that small repairs, like fixing the headliner, can greatly contribute
Buying Guide: Adhesive for Headliner in Car
Understanding the Importance of Headliner Adhesive
When I first decided to tackle my car’s headliner, I quickly realized that the adhesive I chose played a crucial role in the overall success of my project. The headliner is not just a cosmetic feature; it affects the interior aesthetics and can even influence noise insulation. Therefore, finding the right adhesive is essential for a lasting repair.
Types of Adhesives Available
In my search, I came across several types of adhesives suitable for headliner projects. Spray adhesives were my go-to choice because of their ease of application. They provide an even coat and minimize mess. I also considered contact adhesives, which are known for their strong hold. However, I found them a bit challenging to work with due to the quick setting time.
Factors to Consider When Choosing Adhesive
Several factors influenced my decision when selecting the right adhesive. First, I looked at the temperature resistance. My car experiences extreme heat during the summer, so I needed an adhesive that could withstand those conditions. I also considered the drying time. I preferred a product that allowed me some working time before it set, as I wanted to ensure a smooth application.
Surface Compatibility
Ensuring compatibility with the materials in my car’s headliner was another critical aspect. I took the time to identify the fabric and foam used in my headliner. Some adhesives work better on fabric, while others are specifically designed for foam. I learned that using the wrong adhesive could lead to peeling or bubbling, so I made sure to choose one that was compatible.
Application Process
I discovered that the application process could vary significantly depending on the adhesive type. For spray adhesives, I needed to make sure I was in a well-ventilated area and had all my materials ready. I also found that using a roller or brush could help spread the adhesive evenly, especially for thicker materials. For contact adhesives, I had to be precise with my placement, as repositioning could be tricky once the surfaces made contact.
Clean-Up and Safety Precautions
Clean-up was another consideration that weighed on my mind. I wanted an adhesive that wouldn’t leave a messy residue or be difficult to remove from surfaces. I also made sure to wear gloves and a mask during application to protect myself from any harmful fumes, especially when using spray adhesives.
Budget Considerations
Finally, I took my budget into account. While I didn’t want to skimp on quality, I also didn’t want to overspend. I found that prices for headliner adhesives can vary widely, so I focused on finding a balance between quality and cost. In the end, it was worth investing a little more for a reliable product that would last.
Final Thoughts
Choosing the right adhesive for my car’s headliner was a journey of discovery. I learned the importance of understanding the different types of adhesives, their compatibility with materials, and the application process. Armed with this knowledge, I felt confident in making an informed decision for my project. I hope my experiences help you in your quest to find the perfect adhesive for your own car headliner!
Author Profile
-
Hello! I’m Jason Sorenson, and I've spent the last fifteen years immersed in the vibrant world of professional theatre, both on the road and in the iconic Broadway scene of New York City. My journey through the theatre landscape has been marked by my management roles in several acclaimed productions. I've had the privilege of working on Broadway shows such as "To Kill a Mockingbird" starring Jeff Daniels, "Meteor Shower," and "A Doll’s House, Part 2" with Laurie Metcalf. Other highlights include "Shuffle Along," "Wicked," "Glory Days," and "Cyrano De Bergerac" featuring Kevin Kline.
Since 2025, I've channeled my extensive experience in theatre into a new venture—writing an informative blog focused on personal product analysis and first-hand usage reviews. This transition from theatre management to blogging allows me to share my insights on a wide range of products, helping my readers make informed decisions.
Latest entries
- March 8, 2025Personal RecommendationsWhy I Switched to a Folding Infant High Chair: My Personal Journey and Expert Insights
- March 8, 2025Personal RecommendationsWhy I Swear by 6 Oz Plastic Cups: My Personal Experience and Expert Insights
- March 8, 2025Personal RecommendationsCapturing Moments: My Experience with the Disposable Kodak Camera – A Nostalgic Journey Through Analog Photography
- March 8, 2025Personal RecommendationsWhy I Love My 15 Mile Per Hour Electric Scooter: A Personal Journey to Effortless Commuting